Bread Machine Focaccia
Focaccia sits somewhere between bread and pizza — a puffy, olive-oil-slicked flatbread with a crackling crisp bottom and a cloud-soft interior. Making it by hand means wrestling with a dough that’s 75% hydration — so wet and sticky it clings to everything it touches. This bread machine focaccia lets the machine handle the sticky dough, then you take over for the rewarding part: pressing the puffy dough into a hot, oiled pan, dimpling the surface with your fingertips, and scattering rosemary and flaky sea salt across the top.
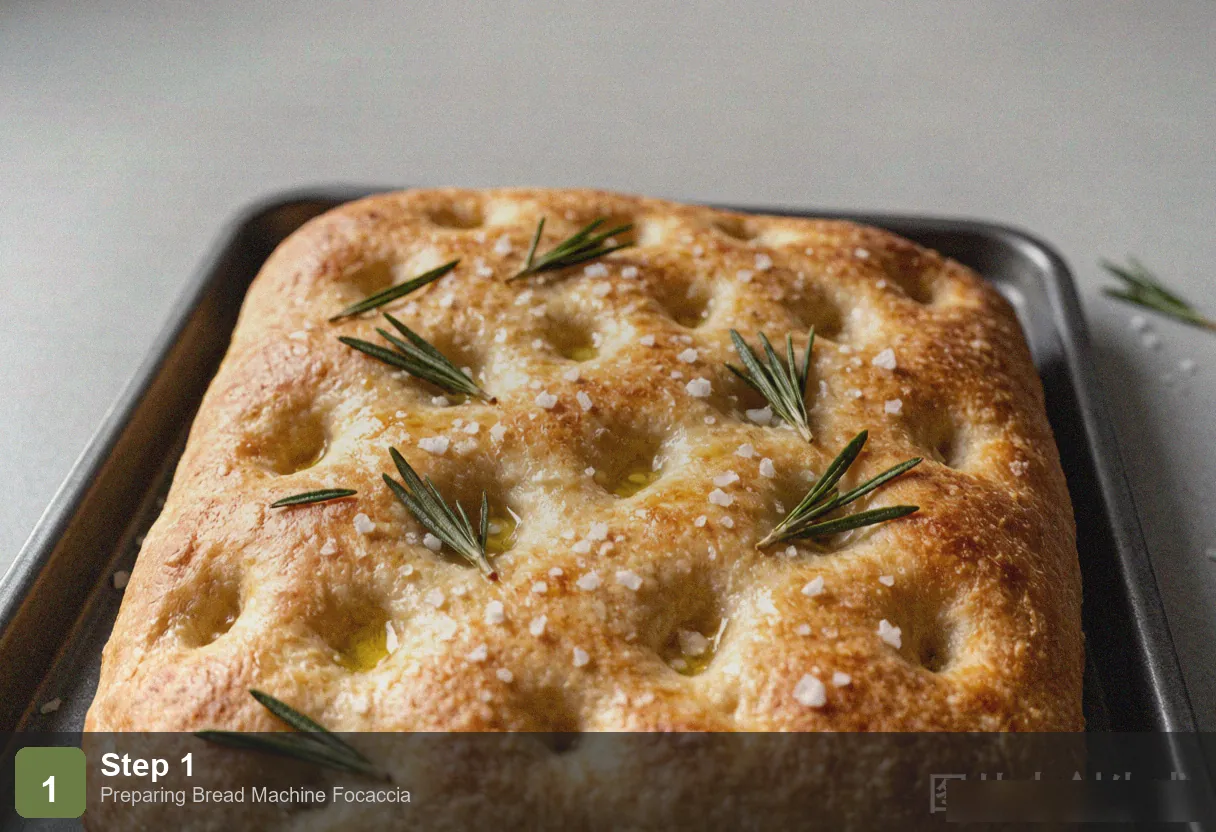
The result is a focaccia with a burnished golden surface, irregular air pockets that catch the olive oil like tiny reservoirs, and a bottom that shatters faintly when you bite into it — the product of dough landing on preheated oil and essentially frying from below while it bakes from above.
Why You’ll Love This Recipe
- A crackling crisp bottom and a cloud-soft top. The magic is in the technique: preheating the baking pan with olive oil until the oil shimmers, then laying the dough directly onto that hot oil. The bottom sears and crisps almost instantly while the rest of the dough rises and bakes into a soft, pillowy crumb. It’s two entirely different textures in every square.
- The machine handles the sticky part. Focaccia dough is 75% hydration — meaning the water weighs three-quarters as much as the flour. At that ratio, the dough is a shaggy, gluey mess that’s genuinely unpleasant to knead by hand. The bread machine’s dough cycle kneads it perfectly in 10 minutes while you do something else. When the cycle ends, you tip the wet dough into a pan and stretch it out with oiled hands — no flour, no sticking, no frustration.
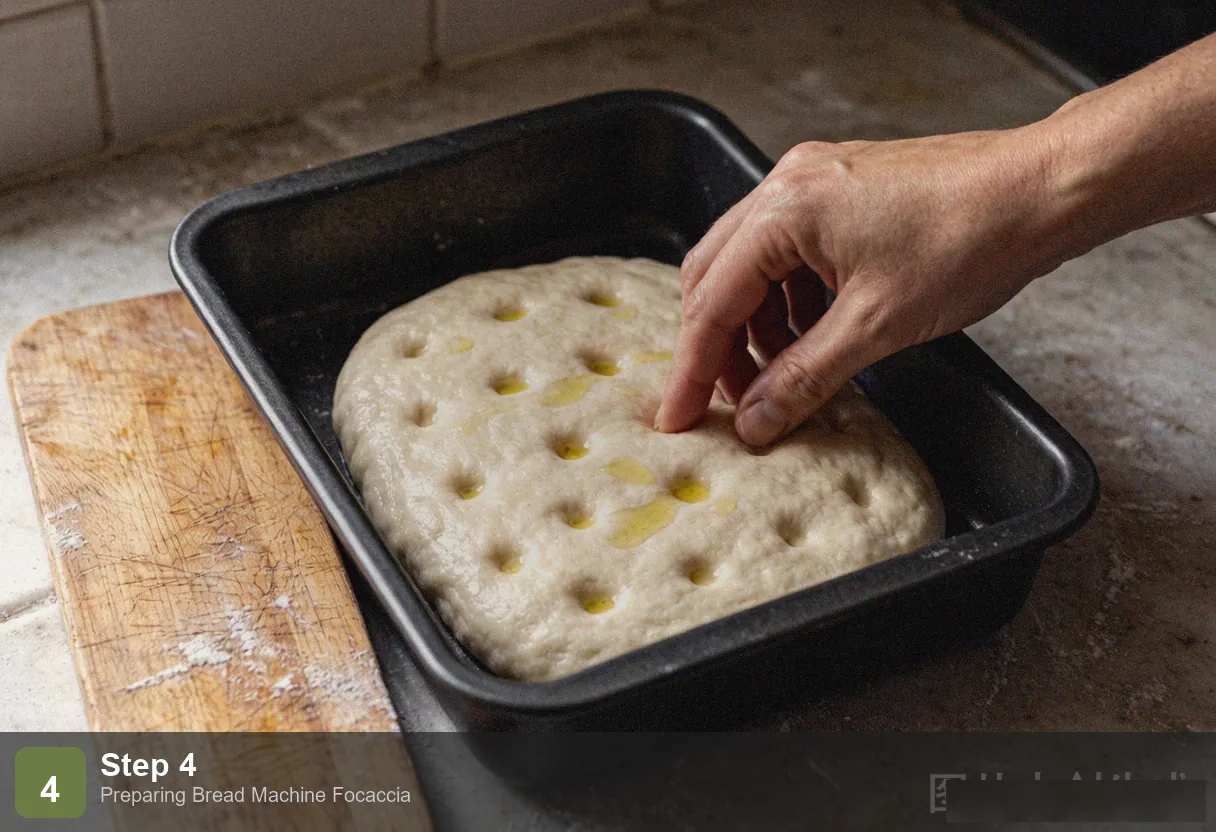
- Dimpling is functional, not decorative. Pressing your fingertips into the proofed dough creates small wells that pool with olive oil. During baking, each well becomes a miniature flavor bomb — the oil concentrates and caramelizes in the depression while the rosemary and salt crystals fuse into the surface. The dimples also prevent the dough from puffing up unevenly, producing a flat, even top instead of a domed loaf.
- A versatile canvas for toppings. Classic rosemary and sea salt is the standard, but focaccia takes well to almost anything: halved cherry tomatoes, sliced olives, caramelized onions, roasted garlic cloves, sun-dried tomatoes, or a shower of grated Parmesan. Think of the dough as a blank canvas and the toppings as your paint.
Ingredients You’ll Need
Dough
- 1⅓ cups warm water (315ml, 95–100°F / 35–38°C)
- 3 cups bread flour (about 375g)
- 2 tablespoons olive oil
- 1½ teaspoons salt
- 2 teaspoons active dry yeast
- 1 teaspoon granulated sugar
Topping
- 3 tablespoons good extra-virgin olive oil
- 2 tablespoons fresh rosemary leaves (or 1 tablespoon dried rosemary)
- 1 teaspoon flaky sea salt (Maldon or similar)
- ½ teaspoon garlic powder (optional)
Olive oil is not optional and cannot be substituted. Focaccia translates roughly to “hearth bread” but it functions as “olive oil bread” — the oil isn’t just a fat in the dough, it’s the primary flavor. It seeps into every air pocket during proofing and baking, perfuming the crumb with a fruity, peppery fragrance. Use a good extra-virgin olive oil that you’d be happy to dip bread into. The flaky sea salt on top isn’t a garnish either — its intermittent crunch and bursts of salinity provide the contrast that makes each bite interesting.
How to Make Bread Machine Focaccia
Step 1: Run the Dough Cycle
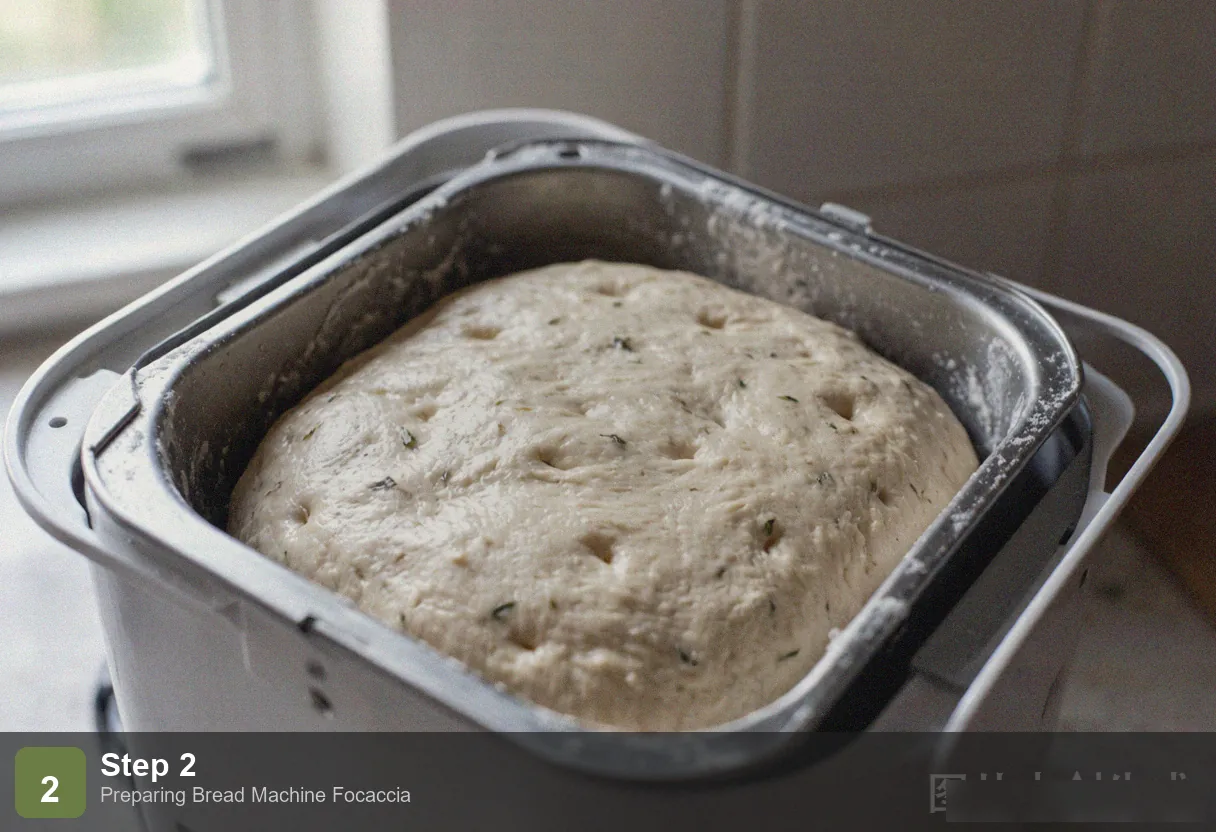
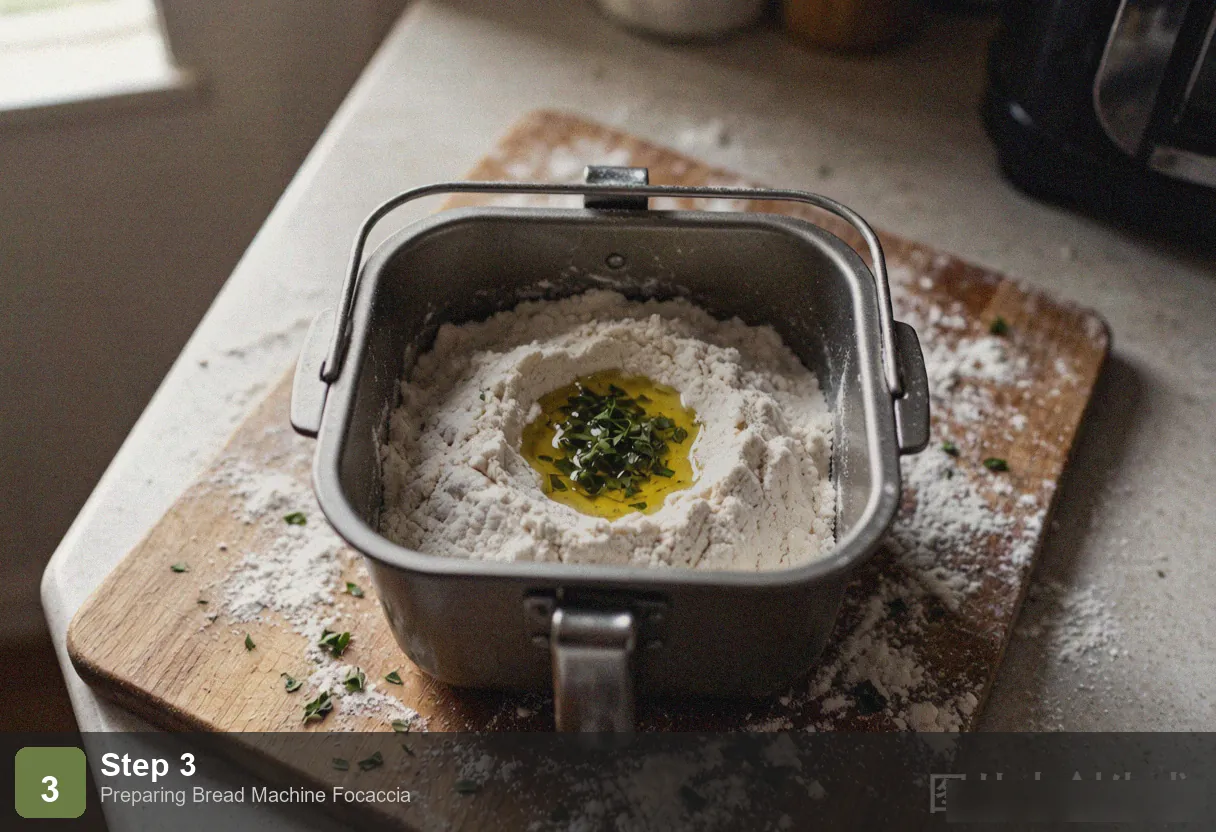
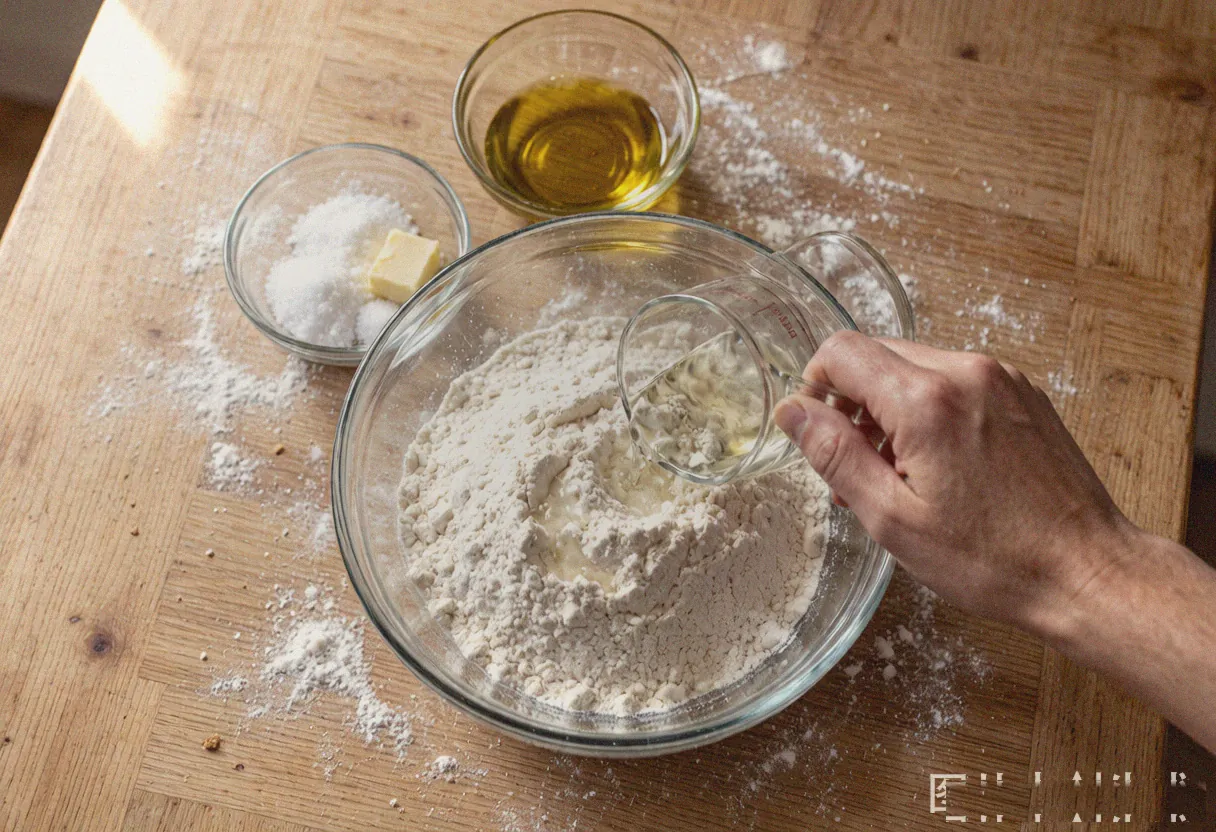
Add ingredients to the bread machine pan in order: warm water, olive oil, flour, salt and sugar in opposite corners, and yeast in a well in the center of the flour. Select the “Dough” cycle and press start. The machine will knead for 10–15 minutes and then complete a 1–1½-hour rise. The dough will look alarmingly wet and sticky — this is correct. High hydration is what creates focaccia’s signature open, irregular crumb. Do not add more flour.
Step 2: Preheat the Pan with Oil
About 10 minutes before the dough cycle ends, prepare your baking vessel. Pour 2 tablespoons of olive oil into a 9×13-inch baking pan (or a 10-inch cast iron skillet) and use a brush or your fingers to coat the bottom and sides thoroughly. Place the oiled pan in the oven and preheat to 425°F (220°C). You want the pan and the oil to be blazing hot when the dough lands — the sizzle you’ll hear when the dough hits the pan is the sound of the bottom crust forming.
Step 3: Transfer the Dough to the Hot Pan
When the dough cycle finishes, the dough will have roughly doubled. Coat your hands with olive oil — not flour — and scoop the wet dough out of the machine pan. Carefully remove the hot pan from the oven and immediately lay the dough into it. You should hear a pronounced sizzle as the wet dough hits the hot oil. Using your oiled fingertips, gently stretch and press the dough until it fills the pan in an even layer. Don’t use a rolling pin — you want to preserve the air bubbles the dough developed during its rise. If the dough resists and keeps springing back, let it rest for 5 minutes and try again.
Step 4: Dimple and Top
Using all ten fingertips, press straight down into the dough to create an even grid of dimples across the entire surface. Press firmly — you want to nearly reach the bottom of the pan without breaking through. The dimples should be about ¾ inch (2cm) apart and ⅓ inch (1cm) deep. Drizzle the remaining 1 tablespoon of olive oil over the top, watching it pool in the depressions. Scatter the rosemary leaves, flaky sea salt, and garlic powder (if using) evenly across the surface. Each dimple will become a concentrated pocket of olive oil, herbs, and salt.
Step 5: Bake Until Golden
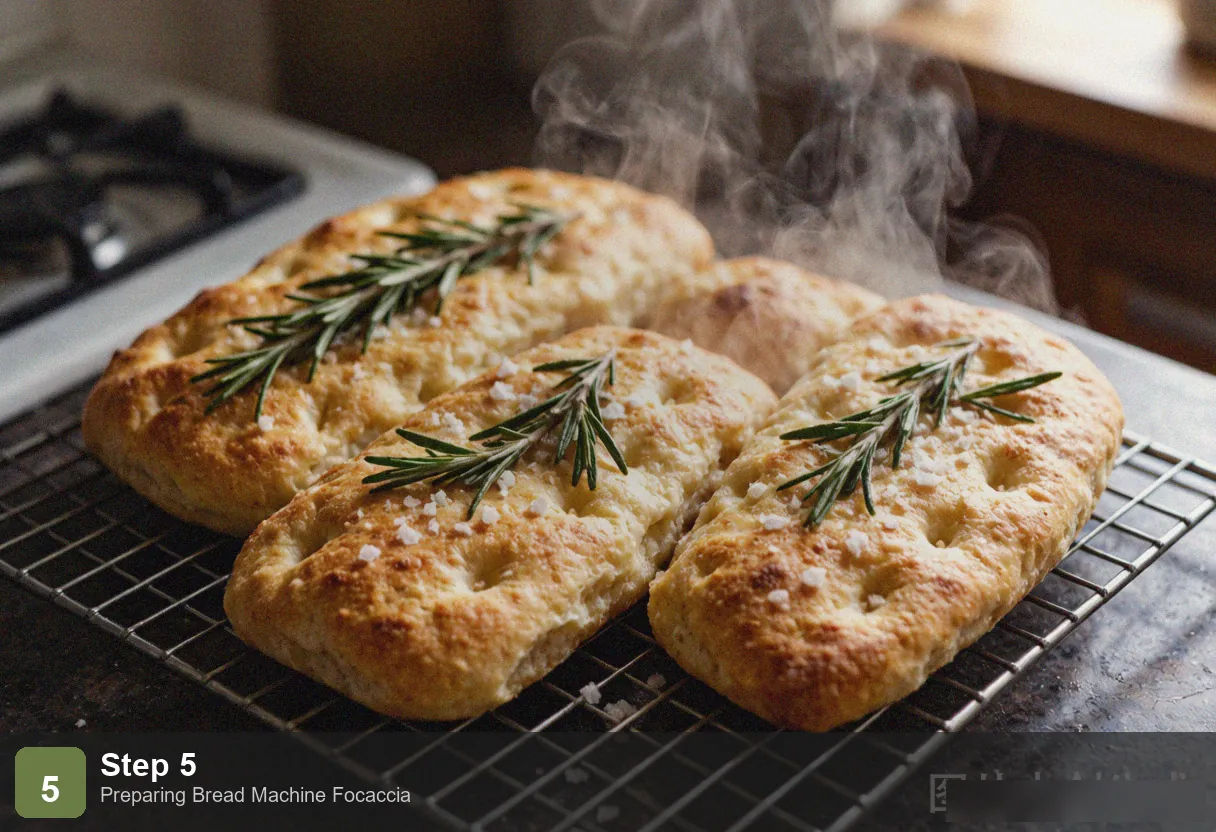
Place the pan in the 425°F (220°C) oven and bake for 18–22 minutes. The focaccia will rise dramatically in the first 5 minutes, then the top will gradually shift from pale to golden to deep burnished brown. The edges will darken more than the center — that’s desirable. It’s done when the top is a uniform deep gold, the edges are pulling away from the sides of the pan, and tapping the bottom produces a hollow sound. Let it cool in the pan for 5 minutes, then slide it onto a cutting board. Slice into squares with a pizza cutter or serrated knife, or simply tear pieces off by hand.
Pro Tips
High hydration is the secret to those large, irregular air pockets. At 75% hydration (315ml water to 375g flour), the dough contains significantly more water than standard bread dough (usually 60–65%). During baking, that water converts to steam, which expands and stretches the gluten into large, irregular bubbles. If you reduce the water to make the dough easier to handle, you’ll get a denser, more cake-like focaccia — still tasty, but missing its signature open crumb. When the dough looks too wet to possibly work with, you’ve got it right.
Hot pan, hot oil — this is non-negotiable for a crispy bottom. Cold dough hitting a cold, oiled pan will steam rather than sear, producing a soft, pale bottom. Preheating the oiled pan at 425°F for 10 minutes means the dough hits a surface that’s roughly 400°F+. The bottom layer of dough fries instantly on contact, forming a thin, crisp, golden-brown crust while the rest of the dough bakes normally. A cast iron skillet amplifies this effect — its thermal mass holds heat far better than a thin aluminum baking pan.
Dimpling isn’t decoration — it’s structural. Without dimples, focaccia dough puffs up unevenly in the oven, creating a domed, bread-like shape rather than a flatbread. The dimples deflate the dough in a controlled pattern and create depressions where the olive oil pools and the herbs embed. They also prevent the large, balloon-like bubbles that can form under the surface of high-hydration dough. Every dimple you press is doing actual work.
Frequently Asked Questions
What if I don’t have a cast iron skillet?
Any oven-safe pan with reasonably high sides works: a 9×13-inch metal baking pan, a square brownie pan, even a round cake pan. Cast iron produces the crispest bottom because of its superior heat retention, but a well-preheated aluminum baking pan gets you about 80% of the way there. Do not use a glass baking dish — glass heats slowly and can shatter from the thermal shock of cold dough hitting a hot surface.
Can I add other toppings?
Absolutely — focaccia is famously versatile. Halved cherry tomatoes (press them cut-side up into the dimples), pitted black olives, caramelized onion strands, roasted whole garlic cloves, sun-dried tomato strips, or grated hard cheese all work beautifully. One caution: high-moisture toppings like fresh tomato slices will release water during baking and can soften the crust underneath. Pat them dry with paper towels before adding, or briefly roast them beforehand to drive off excess moisture.
Can I bake this entirely in the bread machine?
You can, but the result will be a different bread entirely. Without the preheated pan and hot oil, the bottom won’t crisp — it’ll be soft like sandwich bread. Without the dimpling, the top won’t achieve that characteristic flat, pocked surface. The bread machine bake cycle would produce something closer to an olive oil-scented white loaf. If that’s what you want, go ahead — but it won’t be focaccia.
How do I store and reheat focaccia?
Focaccia is at its best within a few hours of baking, when the contrast between the crisp bottom and soft interior is most pronounced. Store leftovers at room temperature in a paper bag or loosely wrapped in a kitchen towel for up to 1 day — the crust will soften but the flavor will hold. Do not refrigerate. To freeze, cut into squares, wrap individually, and freeze for up to 1 month. Reheat squares directly from frozen in a 400°F (200°C) oven for 5–6 minutes, which restores much of the bottom crispness. Never use a microwave — it will turn the crust to rubber.
More Bread Machine Recipes
- Bread Machine French Bread — Crusty on the outside, soft inside
- Bread Machine White Bread — The everyday classic
- Bread Machine Dinner Rolls — Soft pull-apart rolls
- Bread Machine Cheese Bread — A savory cheddar-packed loaf
Nutrition (per piece, about 9 pieces)
| Nutrient | Amount | % Daily Value |
|---|---|---|
| Calories | 195 kcal | 10% |
| Protein | 4g | 8% |
| Fat | 8g | 10% |
| Carbohydrates | 26g | 9% |
| Fiber | 1g | 4% |
| Sodium | 310mg | 13% |
| Iron | 1.5mg | 8% |
Bread Machine Focaccia - Italian Olive Oil Flatbread
Ingredients
Method
- Step 1: Run the Dough Cycle: Add ingredients to the bread machine pan in order: warm water, olive oil, flour, salt and sugar in opposite corners, and yeast in a well in the center of the flour. Select the "Dough" cycle and press start. The machine will knead for 10–15 minutes and then complete a 1–1½-hour rise. The dough will look alarmingly wet and sticky — this is correct. High hydration is what creates focaccia's signature open, irregular crumb. Do not add more flour.
- Step 2: Preheat the Pan with Oil: About 10 minutes before the dough cycle ends, prepare your baking vessel. Pour 2 tablespoons of olive oil into a 9×13-inch baking pan (or a 10-inch cast iron skillet) and use a brush or your fingers to coat the bottom and sides thoroughly. Place the oiled pan in the oven and preheat to 425°F (220°C). You want the pan and the oil to be blazing hot when the dough lands — the sizzle you'll hear when the dough hits the pan is the sound of the bottom crust forming.
- Step 3: Transfer the Dough to the Hot Pan: When the dough cycle finishes, the dough will have roughly doubled. Coat your hands with olive oil — not flour — and scoop the wet dough out of the machine pan. Carefully remove the hot pan from the oven and immediately lay the dough into it. You should hear a pronounced sizzle as the wet dough hits the hot oil. Using your oiled fingertips, gently stretch and press the dough until it fills the pan in an even layer. Don't use a rolling pin — you want to preserve the air bubbles the dough developed during its rise. If the dough resists and keeps springing back, let it rest for 5 minutes and try again.
- Step 4: Dimple and Top: Using all ten fingertips, press straight down into the dough to create an even grid of dimples across the entire surface. Press firmly — you want to nearly reach the bottom of the pan without breaking through. The dimples should be about ¾ inch (2cm) apart and ⅓ inch (1cm) deep. Drizzle the remaining 1 tablespoon of olive oil over the top, watching it pool in the depressions. Scatter the rosemary leaves, flaky sea salt, and garlic powder (if using) evenly across the surface. Each dimple will become a concentrated pocket of olive oil, herbs, and salt.
- Step 5: Bake Until Golden: Place the pan in the 425°F (220°C) oven and bake for 18–22 minutes. The focaccia will rise dramatically in the first 5 minutes, then the top will gradually shift from pale to golden to deep burnished brown. The edges will darken more than the center — that's desirable. It's done when the top is a uniform deep gold, the edges are pulling away from the sides of the pan, and tapping the bottom produces a hollow sound. Let it cool in the pan for 5 minutes, then slide it onto a cutting board. Slice into squares with a pizza cutter or serrated knife, or simply tear pieces off by hand.